This is the setup recommended for developers using the Raspberry Pi 4 (RPi4) device directly. See Raspberry Pi 4 Setup in LAVA for setting up devices for use in LAVA.
Required items
You should have at least:
- 1 Raspberry Pi 4 B device
- 1 Power adaptor
- 1 USB to serial cable/converter (3.3v is mandatory)
- 1 MicroSD card
RPi4 board setup
Attach serial
Please ensure you are using the USB to serial which is 3.3v!
-
Ensure the RPi4 device is off and USB to serial cable is not attached to USB
-
Connect serial to UART ports on RPi4 device.
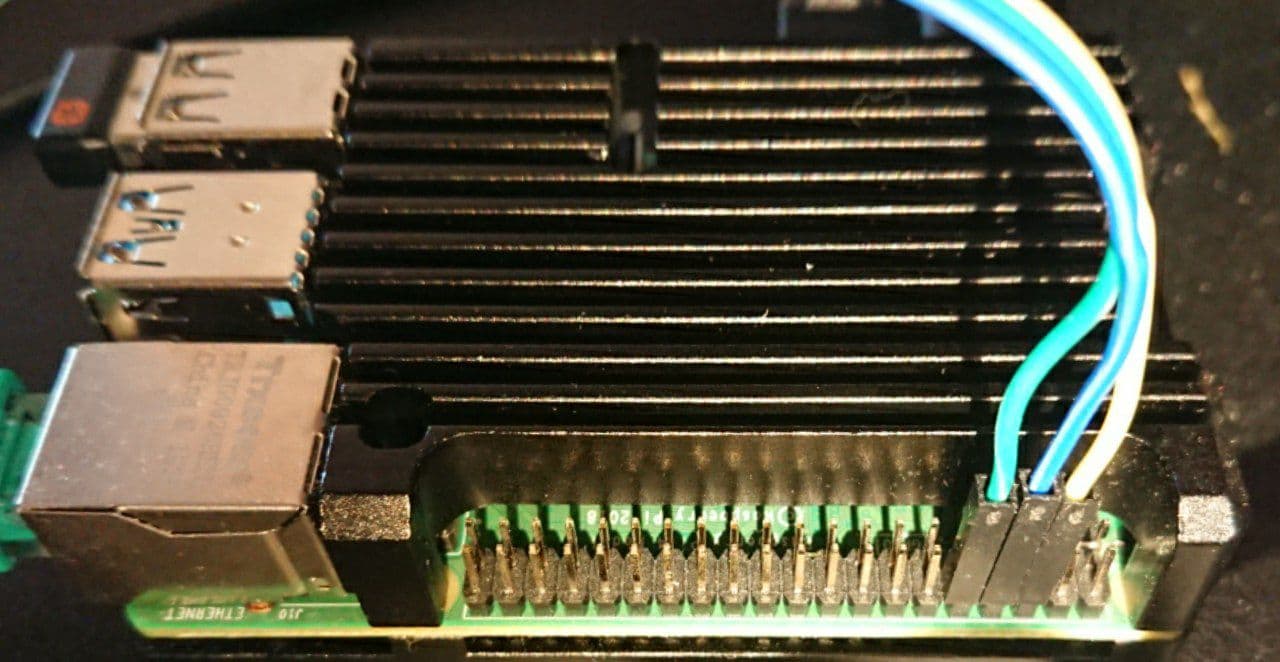
Attach cable wires to pins 6(GND), 8(TXD) and 10(RXD). Keep in mind that RXD from USB serial should be connected to pin 8(TXD) on RPi4 and TXD from USB to pin 10(RXD).
-
Connect USB serial to host.
-
Connect terminal emulator on your host.
Depending on USB serial and operational system you are using the name of UART may differ, as well as the terminal emulator. The parameters for your terminal emulator should be
115200/8-N-1.For Linux-based systems it is usually
ttyUSB0and you may useminicomorscreento connect to serial:minicom -b 115200 -o -D /dev/ttyUSB0or
screen /dev/ttyUSB0 115200
Update bootrom with RPi Imager
It is highly recommended to upgrade the bootrom to the latest available stable version!
The easiest method for updating and managing the boot sequence for local usage and development is the RPI Imager which will prepare the bootable SD-card with fresh updates for you:
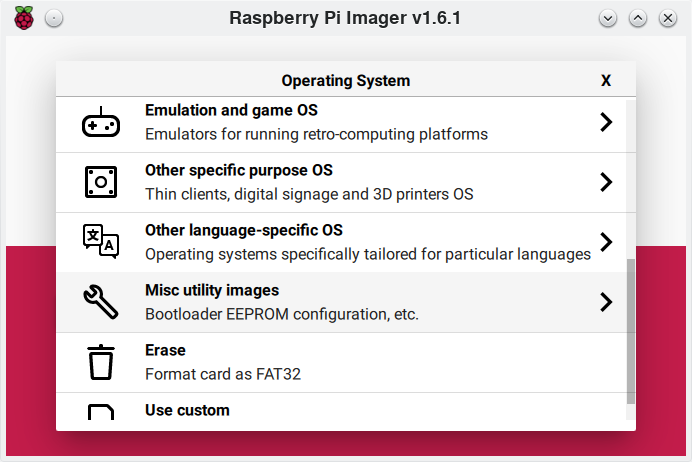
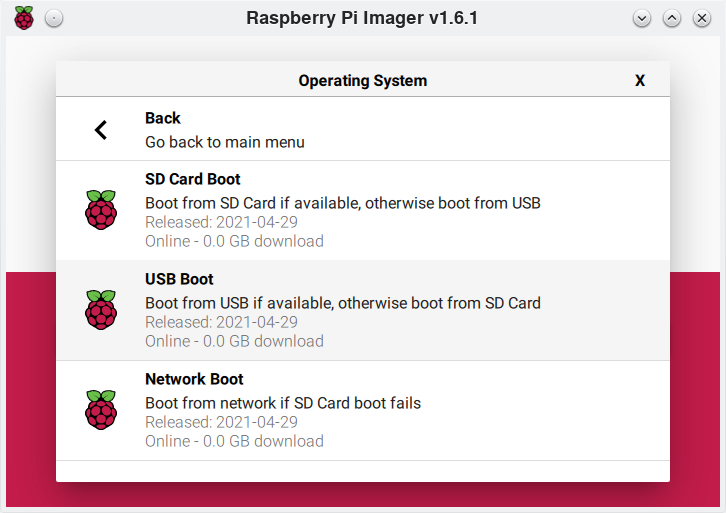
Insert the prepared SD-card into RPi4 and power on the device, on serial you will see the output similar to:
SIG vl805.sig 6246230ecd5b472902e6a49c95e857a5e3190c4fa6c462d6a8867e9a5e523a7c 0
Read vl805.bin bytes    99224 hnd 0x0000009f
PCI reset
PCI reset
VL805 EEPROM is up to date
SIG pieeprom.sig 54285fd35a75f93f59e59bb04706b6a74faaeba91fad5a2cd5bb2279a8a439ab 0
Read pieeprom.bin bytes   524288 hnd 0x00000004
Reading EEPROM: 524288
Bootloader EEPROM is up to date
If you have a display attached to device, it will have a green color in case of success.
Apertis OS startup
Apertis is available through the
RPI Imager (Choose OS -> Other general-purpose OS -> Apertis)
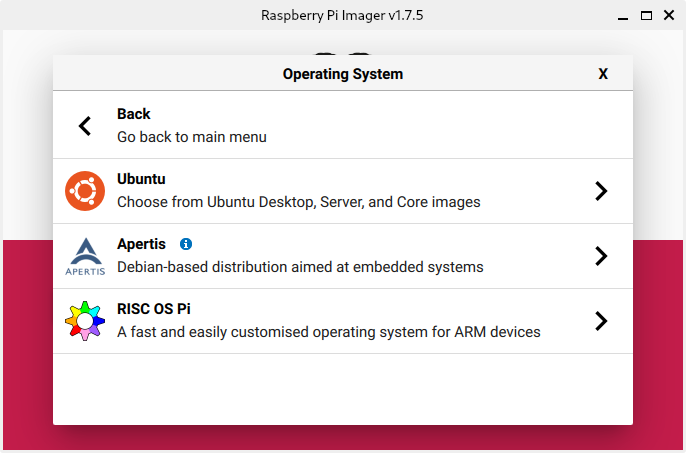
Alternatively the following steps can be taken to manually install an image.
-
On your host download the required image for Raspberry Pi 4 and corresponding
bmapfile (both must haverpi64suffix in file names). For instance, forapertis_v2023-fixedfunction-arm64-rpi64_v2023.1.img.gz:$ wget https://images.apertis.org/release/v2023/v2023.1/arm64/fixedfunction/apertis_v2023-fixedfunction-arm64-rpi64_v2023.1.img.gz $ wget https://images.apertis.org/release/v2023/v2023.1/arm64/fixedfunction/apertis_v2023-fixedfunction-arm64-rpi64_v2023.1.img.bmap -
Flash the downloaded images onto SD-card with
bmaptool, assuming the/dev/mmcblk0is your card reader device:$ sudo bmaptool copy apertis_v2023-fixedfunction-arm64-rpi64_v2023.1.img.gz /dev/mmcblk0Ensure that the target device is not your hard disk to avoid damaging your data!
-
Insert the prepared SD-card into RPi4 device and power on the board. In a few seconds you will see on serial the U-Boot is starting:
U-Boot 2021.01+dfsg-3apertis2bv2022dev3b1 (Jun 22 2021 - 20:50:32 +0000) DRAM: 1.9 GiB RPI 4 Model B (0xb03111) ... -
The Apertis will ask the login prompt:
Apertis v2022dev3 apertis ttyS1
apertis login:
You can login to the console with the username
userand passworduser.
Raspberry Pi 7 Inches Touchscreen support
The touchscreen support has been added in v2022 and v2023dev1 releases.
By default, the touchscreen is disabled and can be activated by modifying the u-boot menu configuration.
As root, add the following line in /etc/default/u-boot:
U_BOOT_FDT="broadcom/bcm2711-rpi-4-b-7inch-ts-dsi.dtb"
then run sudo u-boot-update.
This can be tested with an HMI apertis image.
Connection
To setup the touchscreen, the DSI flat cable must connect the screen to the Raspberry Pi 4 and power must be supplied.
There are 2 ways to supply power to the screen:
-
Via the Raspberry Pi 4 40-pin header, as illustrated by this image:
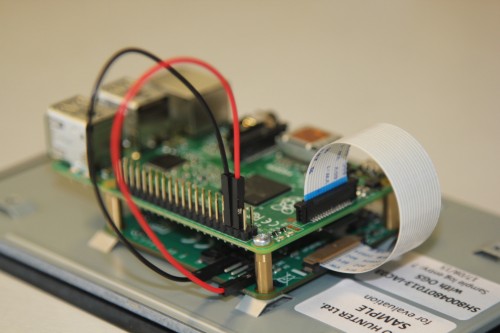 If PIN 6 (GND) is already used by the Serial port, PIN 9 is also GND and can be used for the
touchscreen.
 -
Via the micro USB connector on the touchscreen PCB.
Do not connect both power supply at the same time. This could damage the hardware or even the power supply.
HDMI support
The Raspberry Pi 4 has 2 HDMI outputs. Currently, the touchscreen cannot be used at the same time as the HDMI ports. That is why the touchscreen device tree automatically deactivates them.
This also prevents using the HDMI ports as audio output: the jack output port must be used.


